

Appearance
Voxel Events — Setup
Install the Plugin by uploading to Plugins → Add New → Upload the zip file from your account
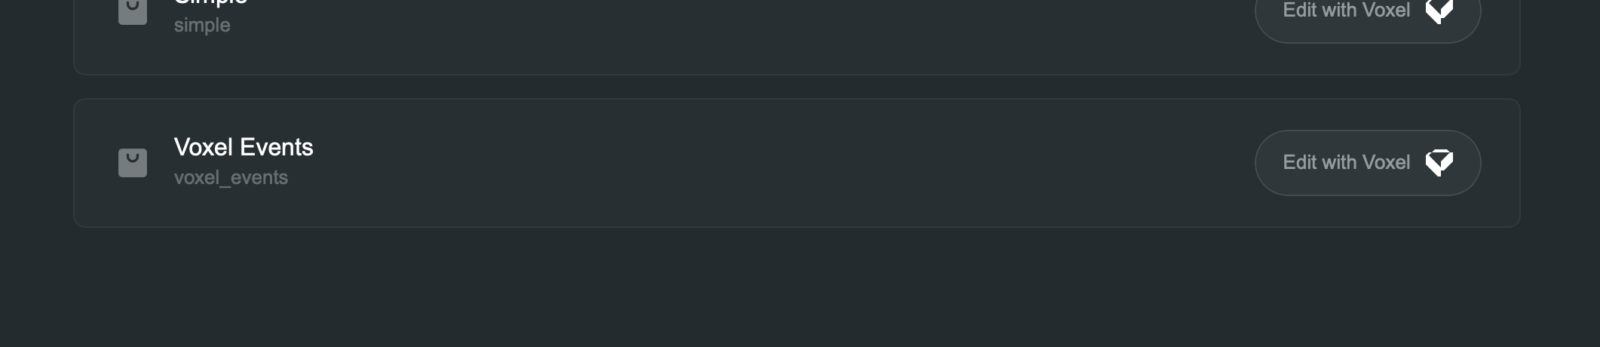
Step 1: Use the New Product Type Already Created Called Voxel Events
There is already a new Voxel Events product type. This is the one you need to use in the next step.
Step 2: Configure Plugin Settings
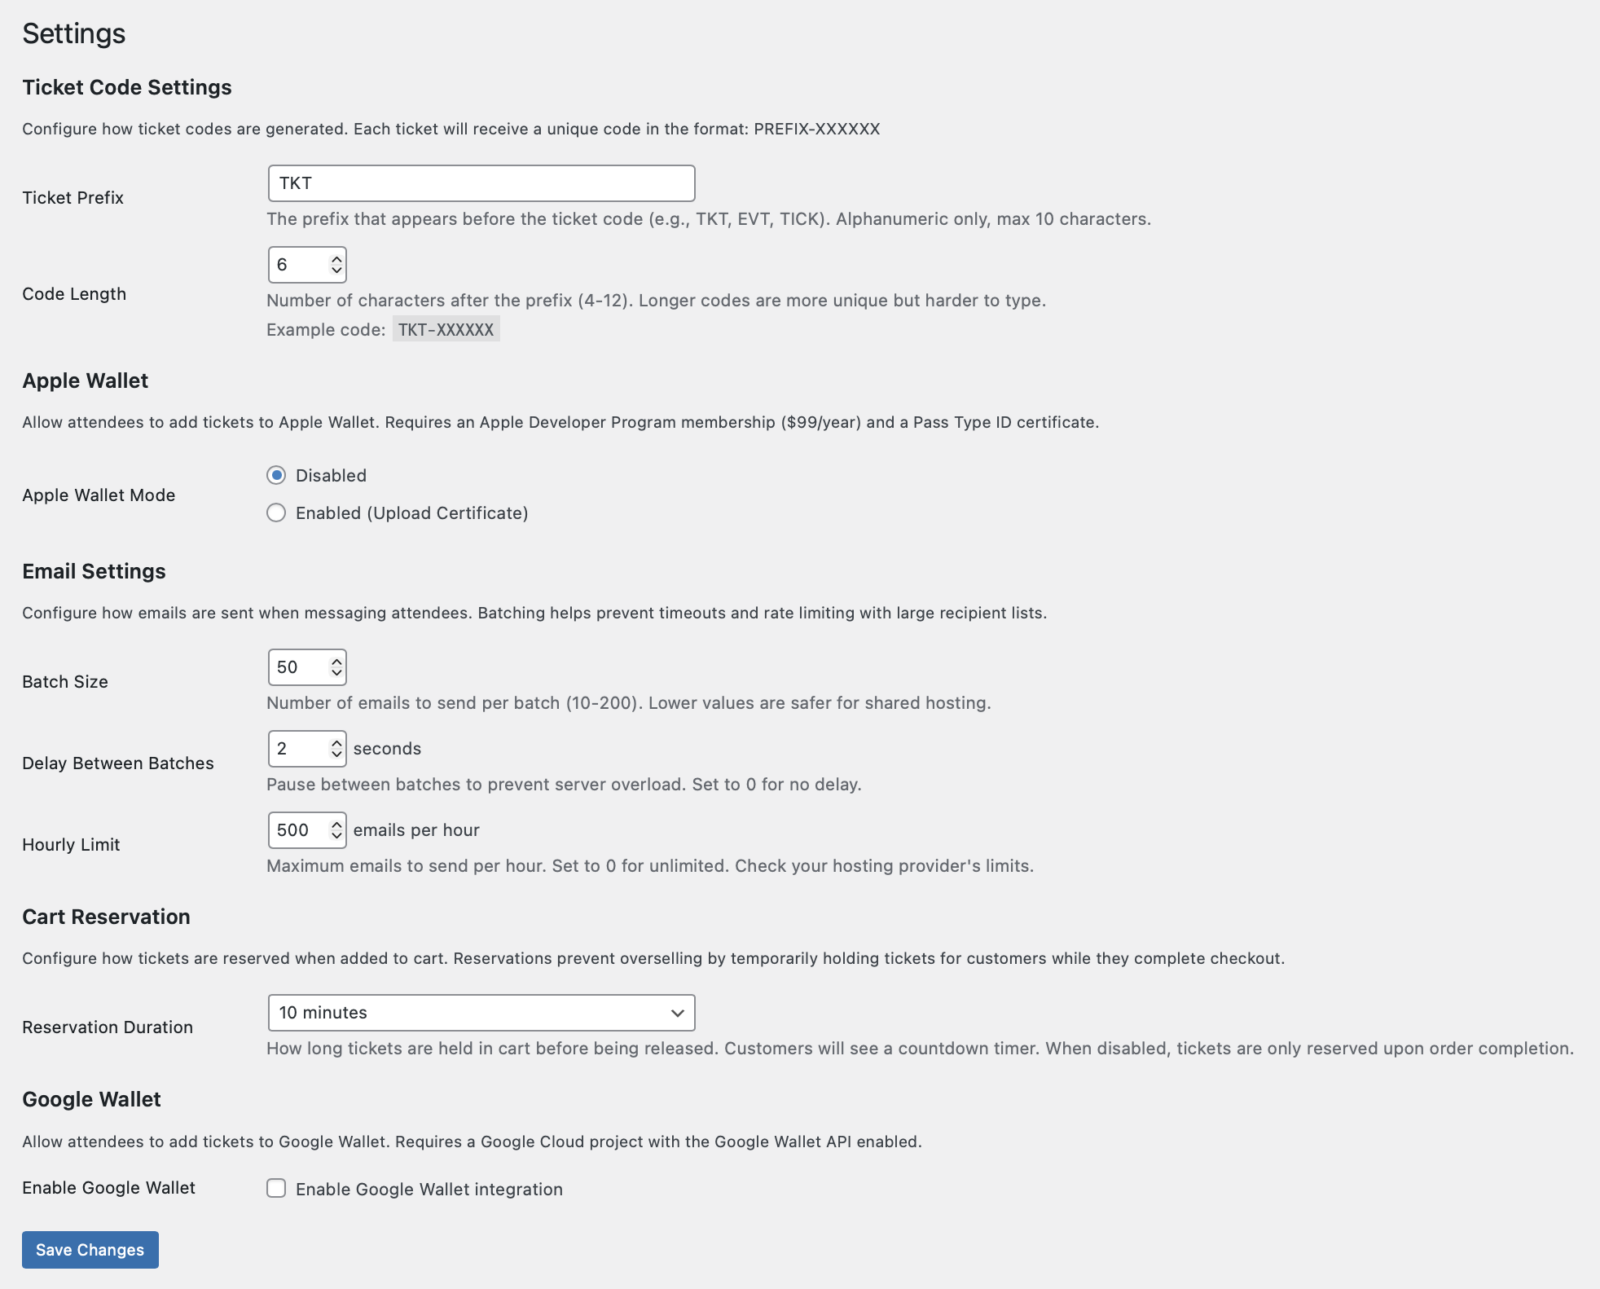
Now you can configure the Event Ticket Plugin settings in your WordPress admin menu:WordPress Admin Menu → Event Tickets → Settings
You can leave everything default, but if you want to configure anything different, now is the time.
**Ticket Prefix:**This will allow you to add a prefix to the beginning of your tickets making them unique. **Code Length:**This is how many numbers/letters will come AFTER the Ticket Prefix
Email Settings: This allows you to setup how many emails are sent from your site at once. Check with your email provider to see which numbers these should be set to.
**Cart Reservation:**Configure how tickets are reserved when added to cart. Reservations prevent overselling by temporarily holding tickets for customers while they complete checkout.
**Service Fees:**Allow your vendors to charge a service fee per ticket.
**Apple Wallet:**If you wish to enable the ability to allow customers to add the ticket to their Apple wallet, choose Enabled. Follow the steps below to generate a .p12 certificate to upload it to your website.
**Google Wallet:**If you wish to enable the ability to allow customers to add the ticket to their Google wallet, check this box. Follow the steps below to get the needed credentials for your site.
Step 3: Adding Needed Fields
Under your post type → Edit Post Type → Fields, be sure to add a Recurring Datefield to your post type. Regular date fields will not be compatible.
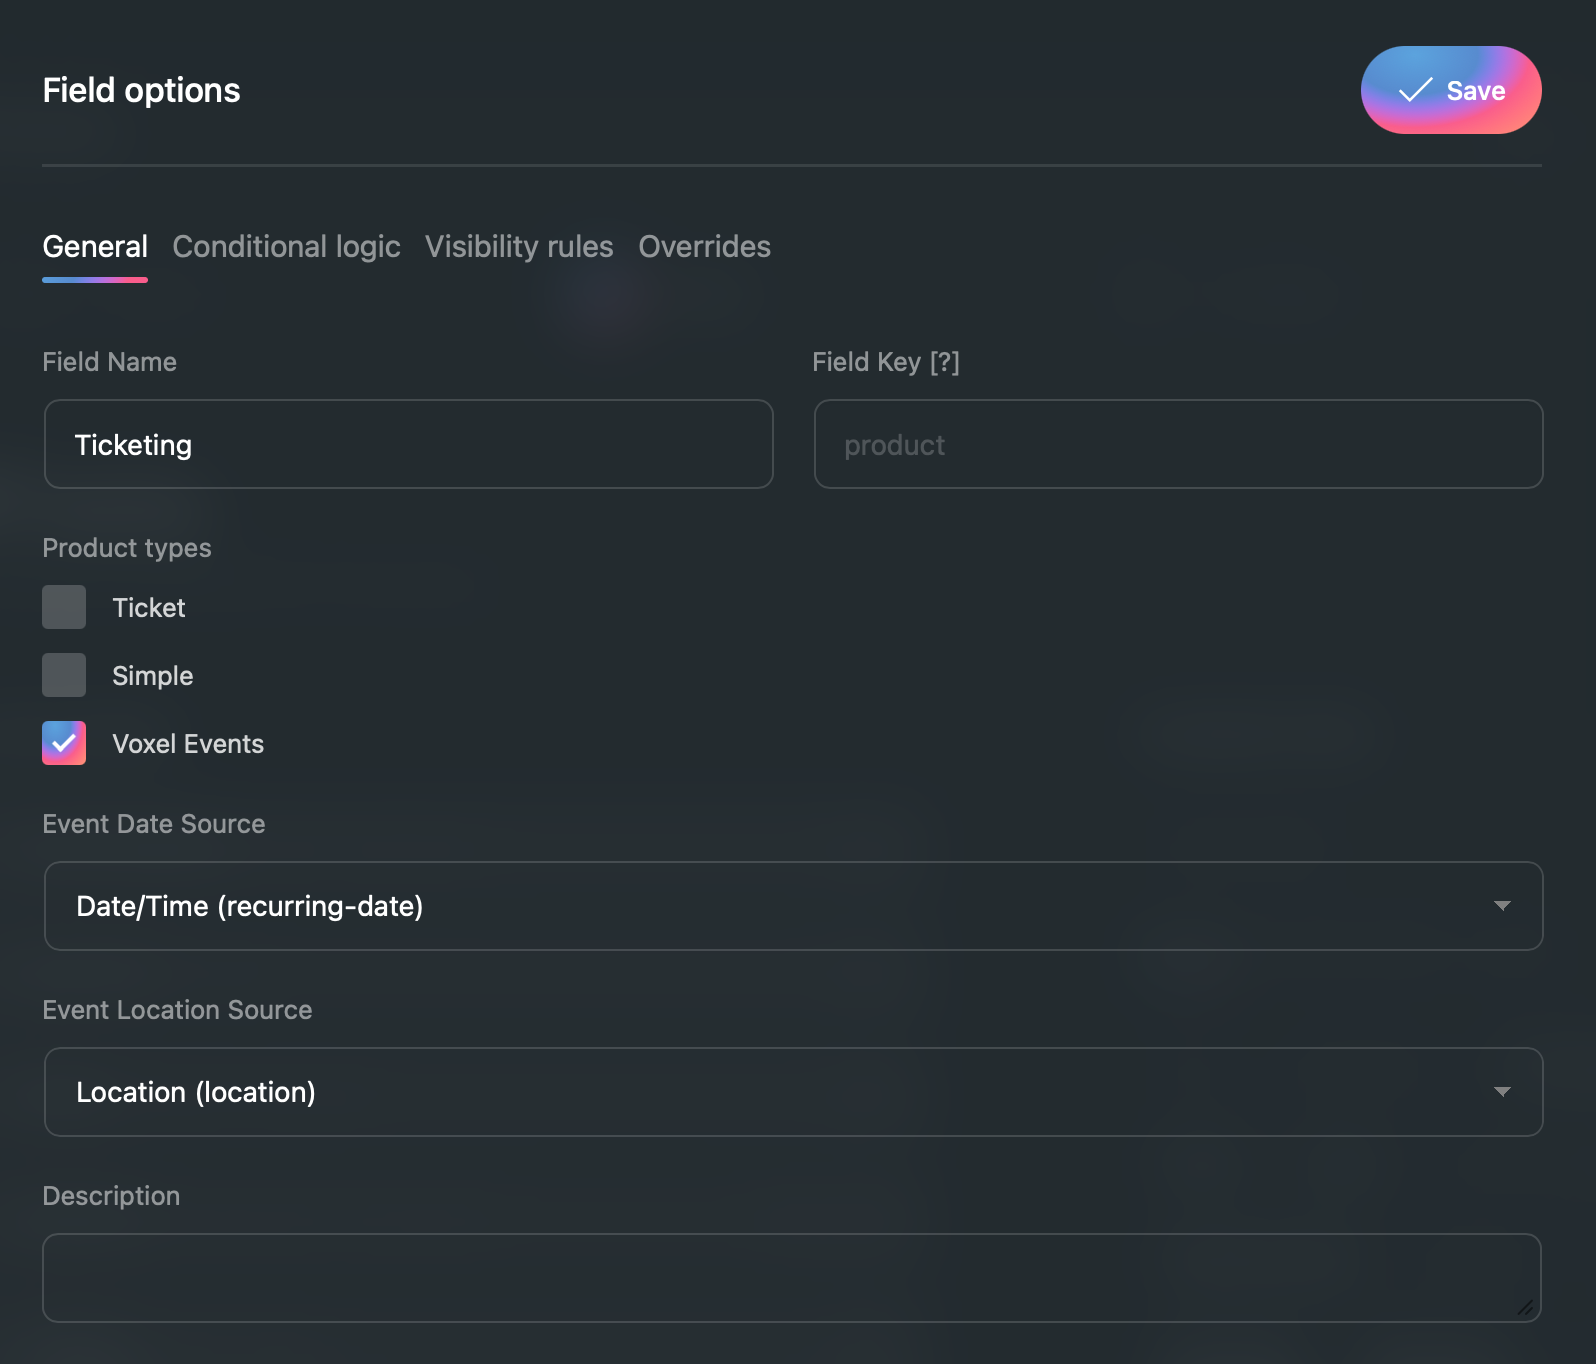
Under your post type → Edit Post Type → Fields, add a Product field and check the product type Voxel Events. Also, you need to select the event date source and location source.
Step 4: Configure Your Tickets
Enable the new Tickets switch in the product field on the create form.

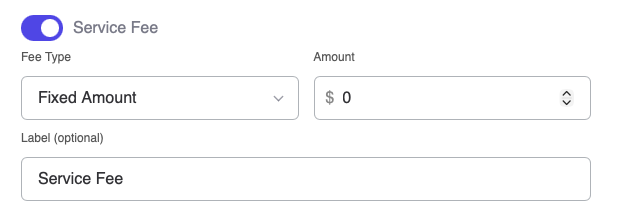
Option to Enable Service Fee Per Post
Set the Sales Cutoff — how many minutes before each event start time ticket sales should stop. Enter 0 to sell right up to the start. It's enforced in the slot picker and again at purchase, so a stale page can't get around it.
Add Ticket Types and set the Name, Price, Default Price and optional Description.
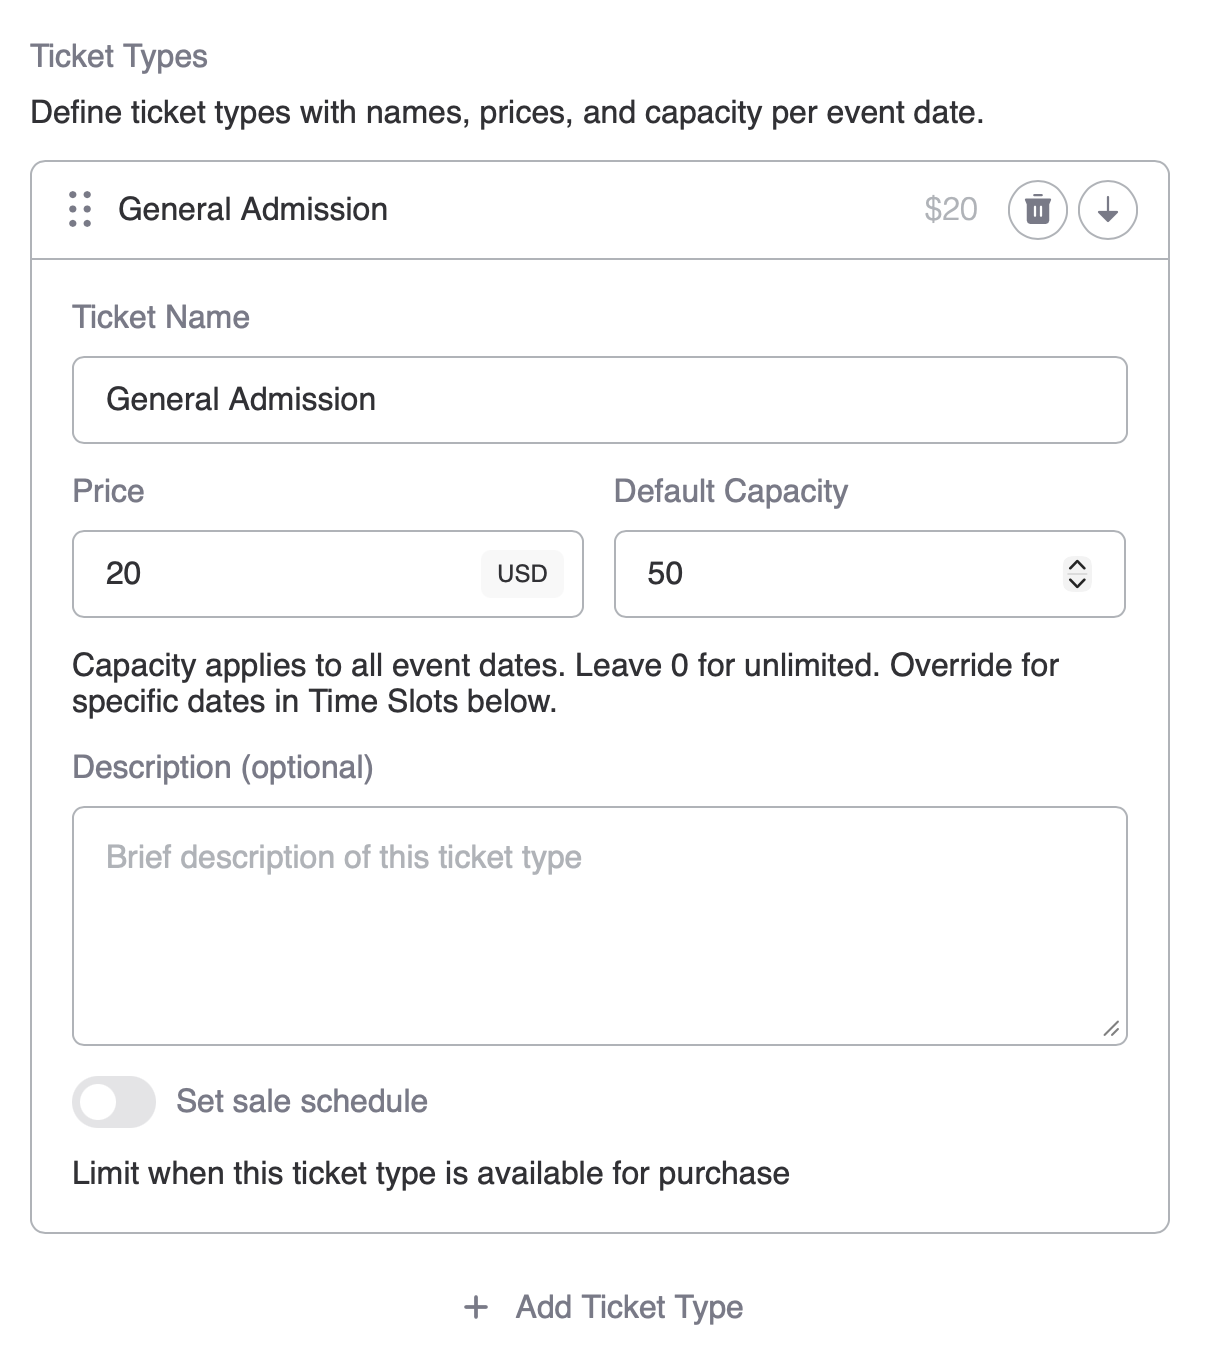
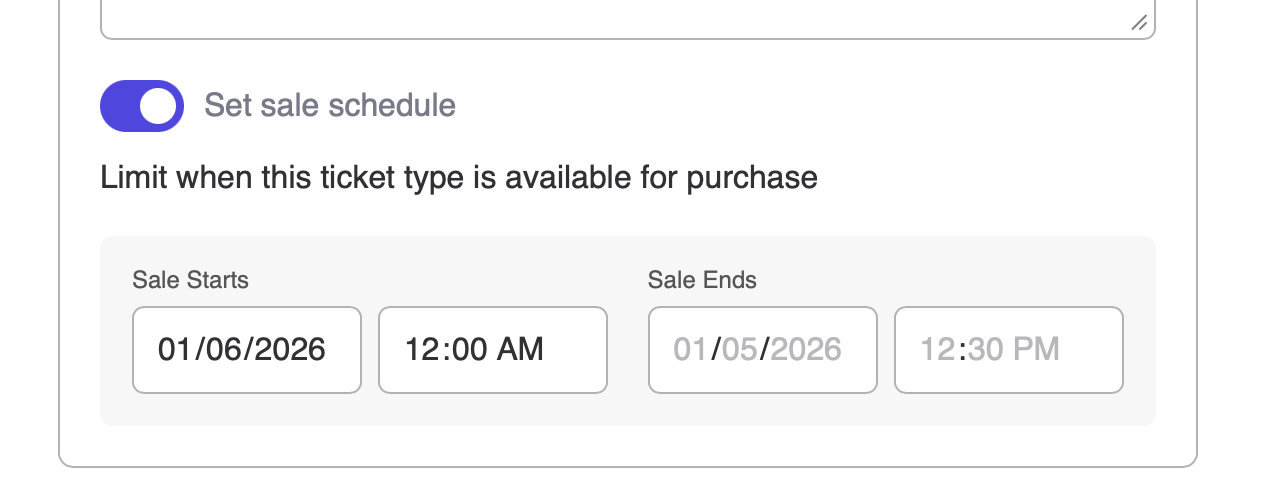
If you want to schedule the ticket sales, enable the Set Sale Schedule
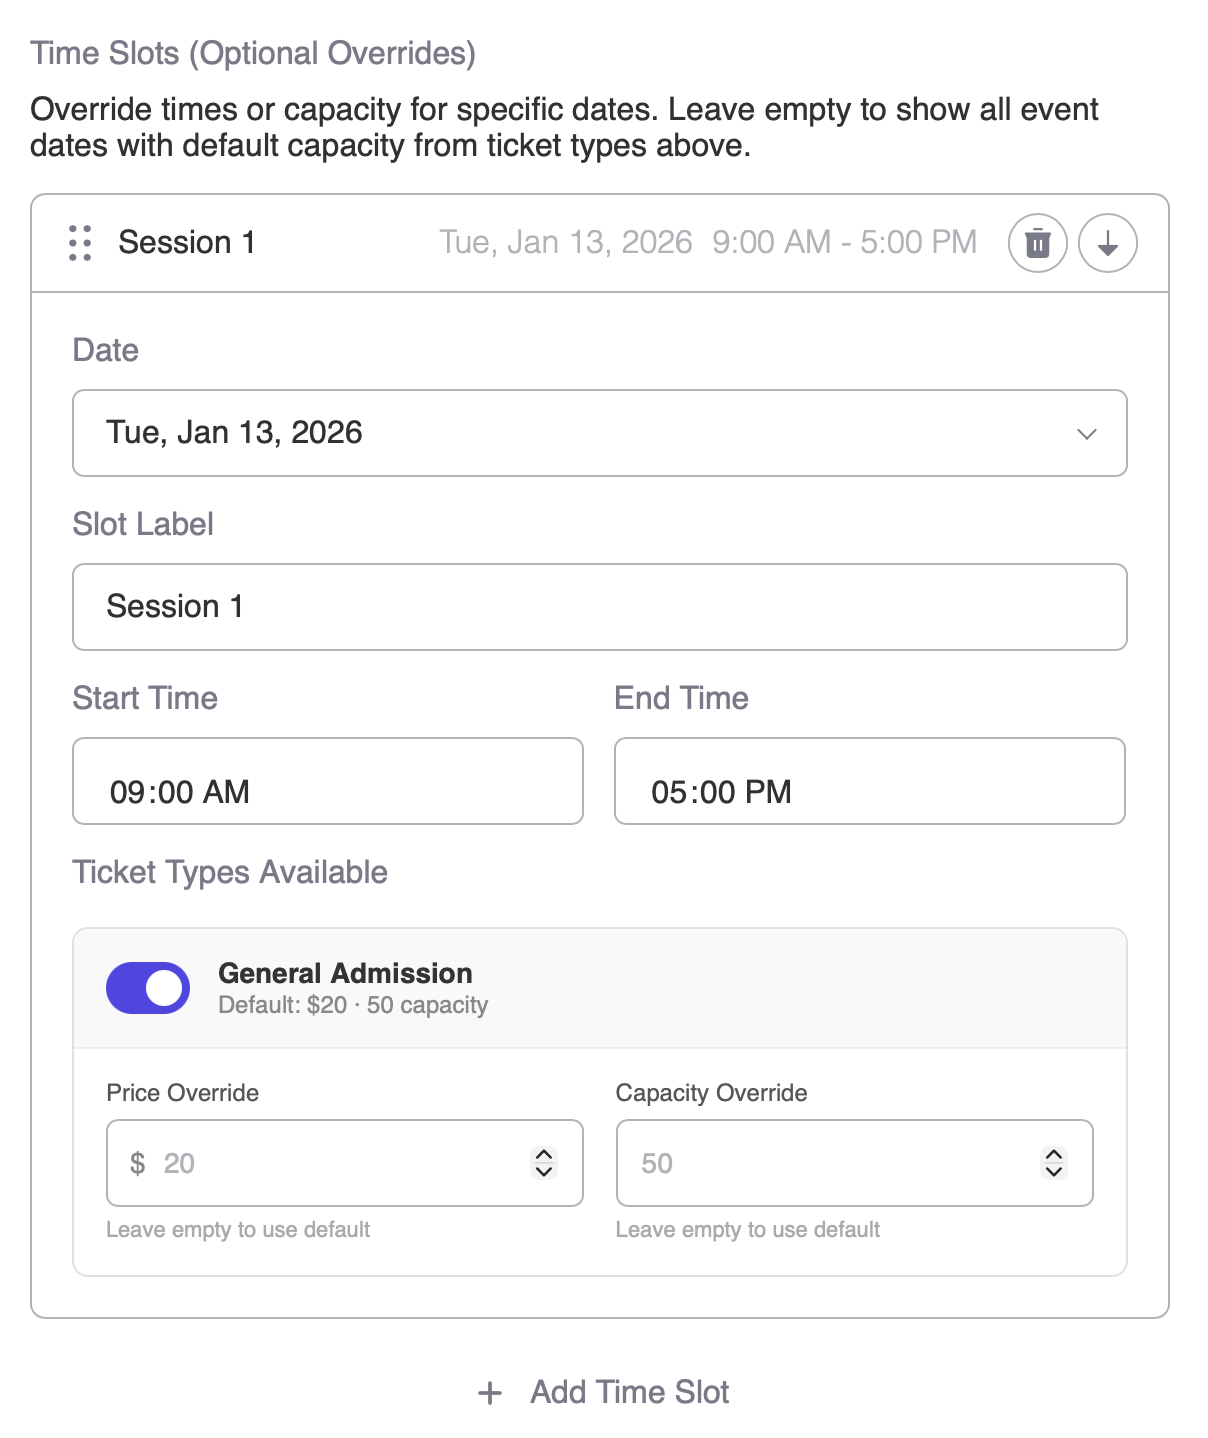
Add and Configure your time slots with date, times, label, pricing and capacity per ticket type. The dates are pulled from the event date field you added previously. You can even disable the ticket for a specific time slot if you need to, or mark a date as sold out outright.
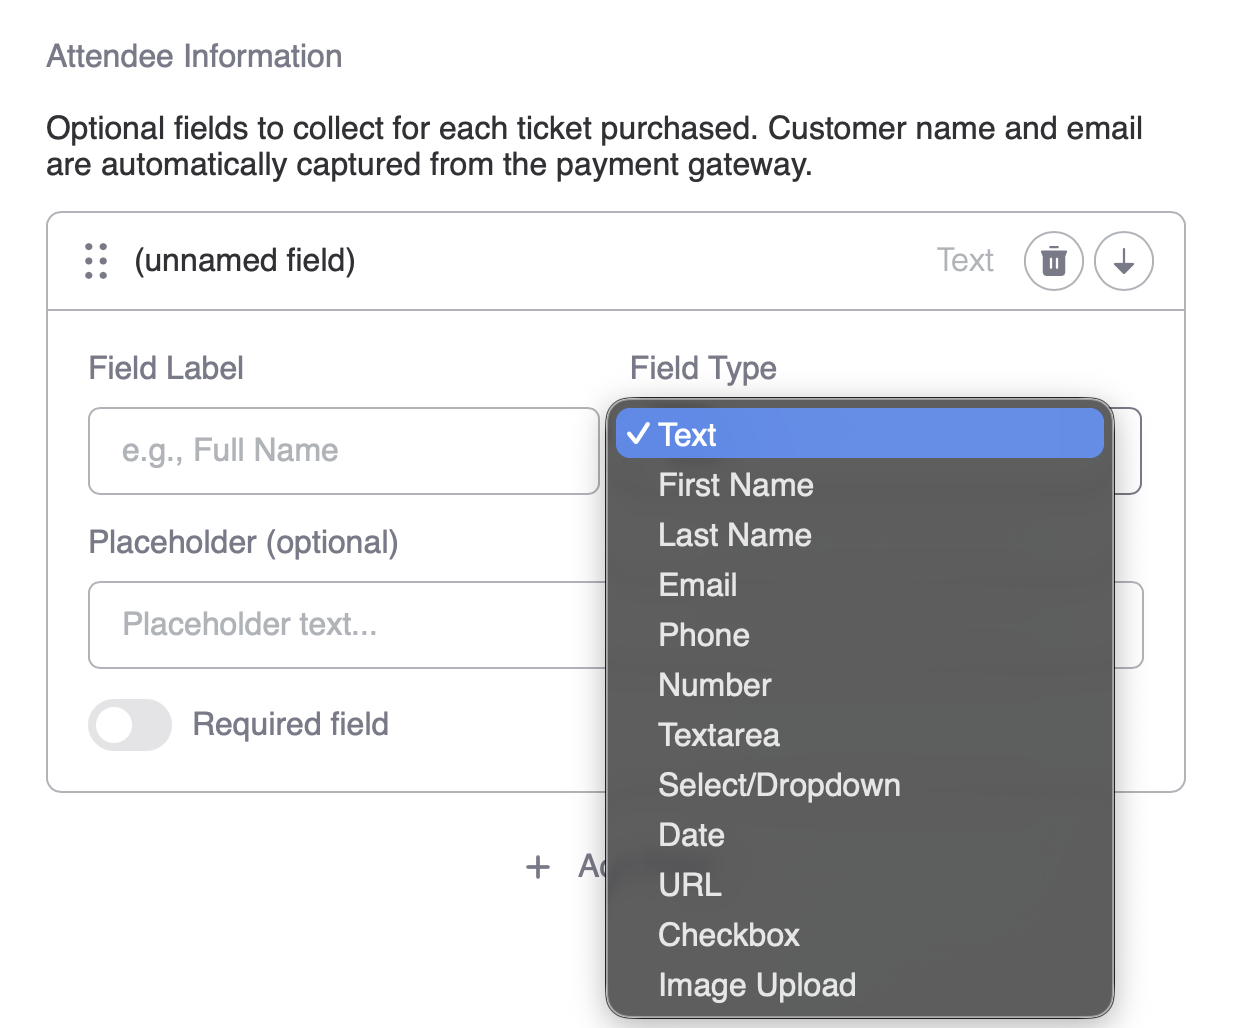
Optional: Add attendee fields for the tickets.
These two sections are hidden by default
Since 1.1.0, Time Slots (Optional Overrides) and Attendee Information are hidden in the create-event form. Turn them back on under Event Tickets → Settings → Create Event Form — see Settings. Data saved before they were hidden is preserved.
Free tickets need attendee fields to identify anyone
Paid tickets capture the buyer's name and email at checkout, so you can leave those fields out. Free tickets skip checkout entirely — without a name or email field, those attendees stay anonymous.
Step 5: Elementor Widgets
On the single post template, you will need at minimum the Ticket Product Form (VE), and the Event Check-In (VE) widget.
Ticket Product Form (VE): This is our version of the Voxel product form. It allows us to customize and show specific ticket functions. This will be needed on the single post template and allows your customers to add the tickets to the cart. This widget has all the styling needed to make it look like your own.
- Show Time Slots: The pill shaped time slots that allow customers to pick different time slots.
- Show Attendee Fields: If you wish to allow users to fill in the form with information.
- Show Order Summary: A summary of the items being added to their cart.
- Show Preview in Editor: Shows dummy ticket information so you can style accordingly.
**Event Check-In (VE)😗*This widget allows you to add the check in capability to the single post template with two options.
- Manual Entry: Type in the ticket or use a physical barcode scanner to bring up the ticket information
- QR Scanner: This is a built in QR code scanner which allows you to use your mobile device to scan the the QR code to bring the popup with ticket action.
**Sold Tickets (VE)😗*This widget will display a list of sold tickets for a given post. Either use Voxel dynamic tags to enter in the post ID to only show tickets for that post, or leave blank to show all tickets from all current user posts. Great if you want to add it to the user dashboard.
- Per-Day Summary View: This view shows the tickets grouped by time slot.
- Show Filters: Enables the ability to show filters such as Not Checked In, Checked In, etc.
- Show Export Button: Allows the author to export the attendees to a CSV.
Message Attendees (VE): Allowing your vendors the ability to mass email their attendees for different instances is important. This widget allows them to schedule emails either on a specific day, a certain amount of time before or after the event, or to send an email immediately. This is great for reminders, if something important comes up regarding the event maybe a delay, or cancellation, as well as after event emails for reviews, or after event actions.
- Show scheduled messages: Show the list of messages sent by the post author.
- Event Source: Choosing this will allow you to display certain items on the widget.
- Current Post: Use on a single event template. Automatically fetches the post ID for the event.
- Event Dropdown: Use on a page like dashboard. Shows a dropdown for the vendor to select the event from.
- Specific Post ID: Allows you to hardcode a specific event.