

Appearance
Installation and Setup of Voxel Events
Step 1: Install the Plugin
- Go to Plugins → Add New in your WordPress dashboard
- Click Upload Plugin at the top of the page
- Select the Voxel Events plugin zip file
- Click Install Now
- Once installed, click Activate
Step 2: Activate Your License
- Go to Event Tickets → License in your WordPress menu
- Enter your license key
- Click Activate License
Step 3: Create or Choose Your Event Post Type
You need a post type in Voxel to hold your events. You can use an existing post type or create a new one.
To Create a New Post Type:
- Go to Structure → Post Types
- Click Create Post Type
- Give it a name like “Events” or “Shows”
- Configure the basic settings as needed
- Click Save
Step 4: Add a Product Field
The product field is where you’ll configure your tickets.
- Go to Structure → Post Types
- Click on your event post type
- Go to the Fields tab
- Click Add Field
- Select Product from the field types
- Give it a label like “Tickets” or “Admission”
- Click Save

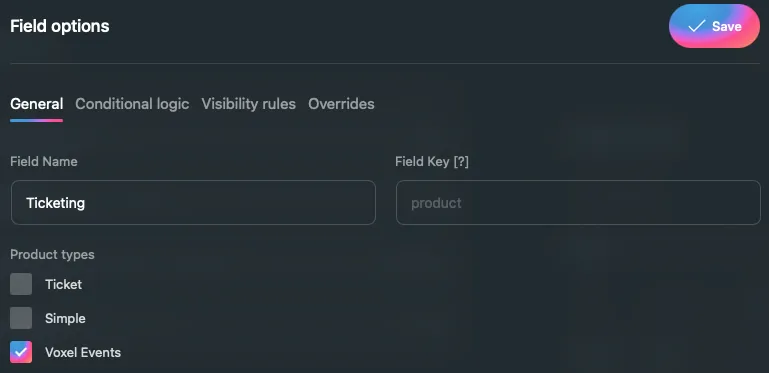
Step 5: Enable the Voxel Events Product Type
Now you need to tell Voxel to use the Voxel Events product type for your tickets.
- In your post type settings, find the Product field you just created
- Click on the product field to open its settings
- Look for Product Type and select Voxel Events
- Click Save
Step 6: Configure the Date Source
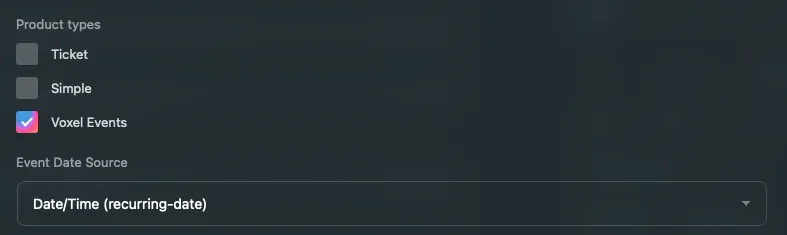
Your events need dates. Voxel Events uses Voxel’s recurring date field to know when your event happens.
Add a Recurring Date Field:
- In your post type fields, click Add Field
- Select Recurring Date as the field type
- Give it a label like “Event Dates” or “Schedule”
- Configure the date settings as needed
- Click Save
Connect the Date Field to Ticketing:
- Click on your Product field
- In the product field settings, find Date Source
- Select the recurring date field you just created
- Click Save
Now when you create an event and add dates, those dates will automatically be available for ticket time slots.
Step 7: Configure the Location Source
If your events have physical locations, you can connect an address field so ticket buyers see venue information.
Add a Location Field:
- In your post type fields, click Add Field (if you don’t already have one)
- Select Location or Address as the field type
- Give it a label like “Venue” or “Event Location”
- Click Save
Connect the Location Field:
- Click on your Product field
- In the product field settings, find Location Source
- Select your location/address field
- Click Save

Step 8: Configure Global Plugin Settings
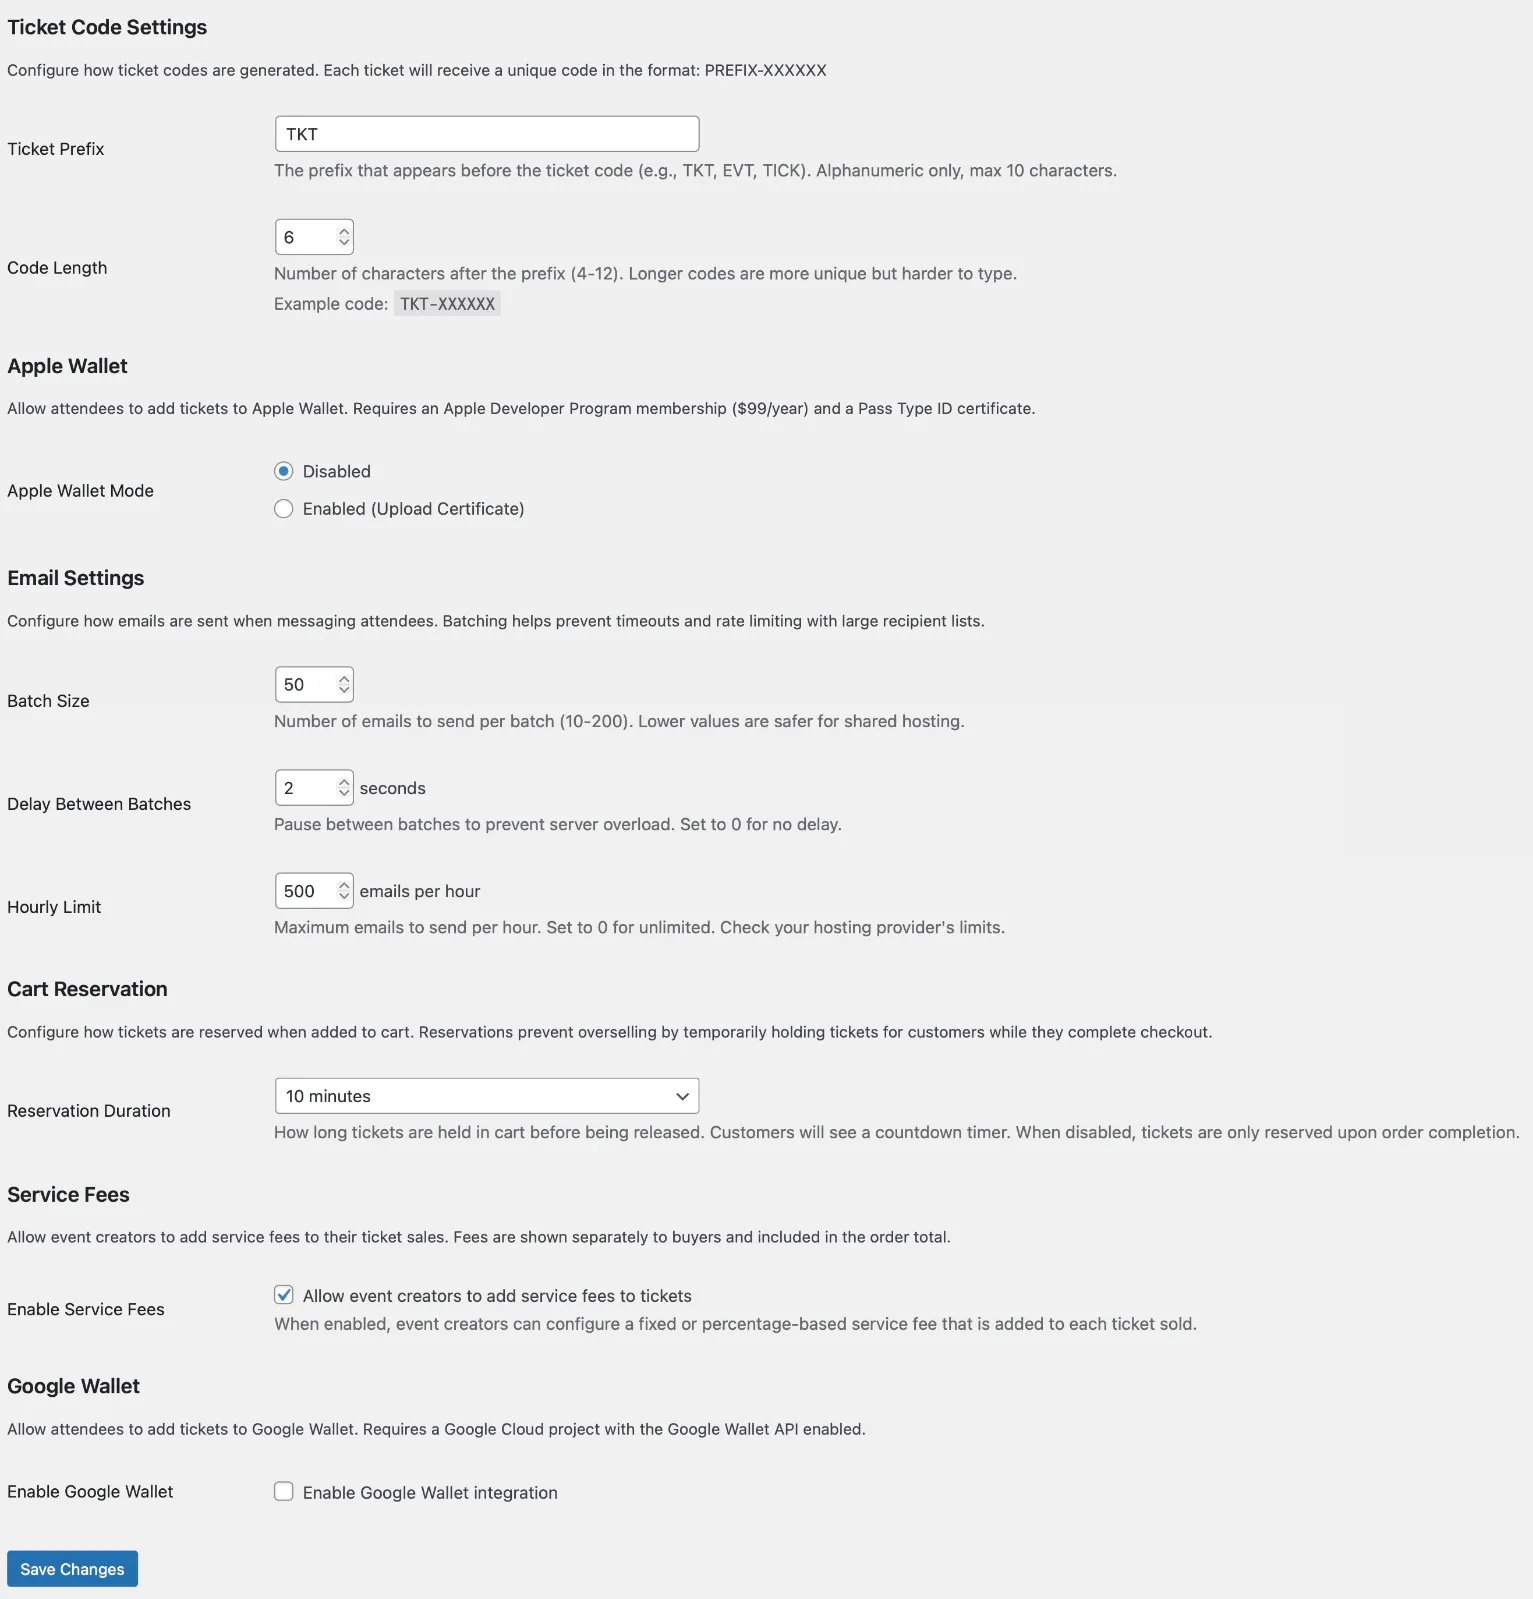
Before creating your first event, review the global settings.
- Go to Event Tickets → Settings
Ticket Code Settings
- Ticket Prefix: A short code that appears before ticket numbers (e.g., “EVT” creates codes like EVT-ABC123)
- Code Length: How many characters in the unique part of the code (4-12 characters)
Cart Reservation Settings
When customers add tickets to their cart, you can reserve those seats temporarily:
- Disabled: No reservation (first to complete checkout gets the tickets)
- 5-20 minutes: Tickets are held for this duration while the customer completes checkout
Email Settings
If you plan to message attendees:
- Batch Size: How many emails to send at once (start with 50)
- Batch Delay: Seconds between batches (prevents server overload)
- Hourly Limit: Maximum emails per hour (0 = unlimited)
Troubleshooting
Dates aren’t showing in time slot options
Make sure:
- You have a recurring date field in your post type
- The date field is connected as the Date Source in your product field settings
- Your event has dates added